
How to make a fast and accurate longbow with simple tools and common dimensional lumber. Everything you need to know to make a bow like this.
- Wood Selection
- Design and Layout
- Handle and Fades
- Tools
- the Rough Out
- Backing (Optional)
- the Tiller
- the String
- Nocks
- Longstring Tillering
- Shortstring Tillering
- Set (and Heat Treating)
- Final Shaping
- Final Tiller
- Troubleshooting
- Shooting In
- Finishing
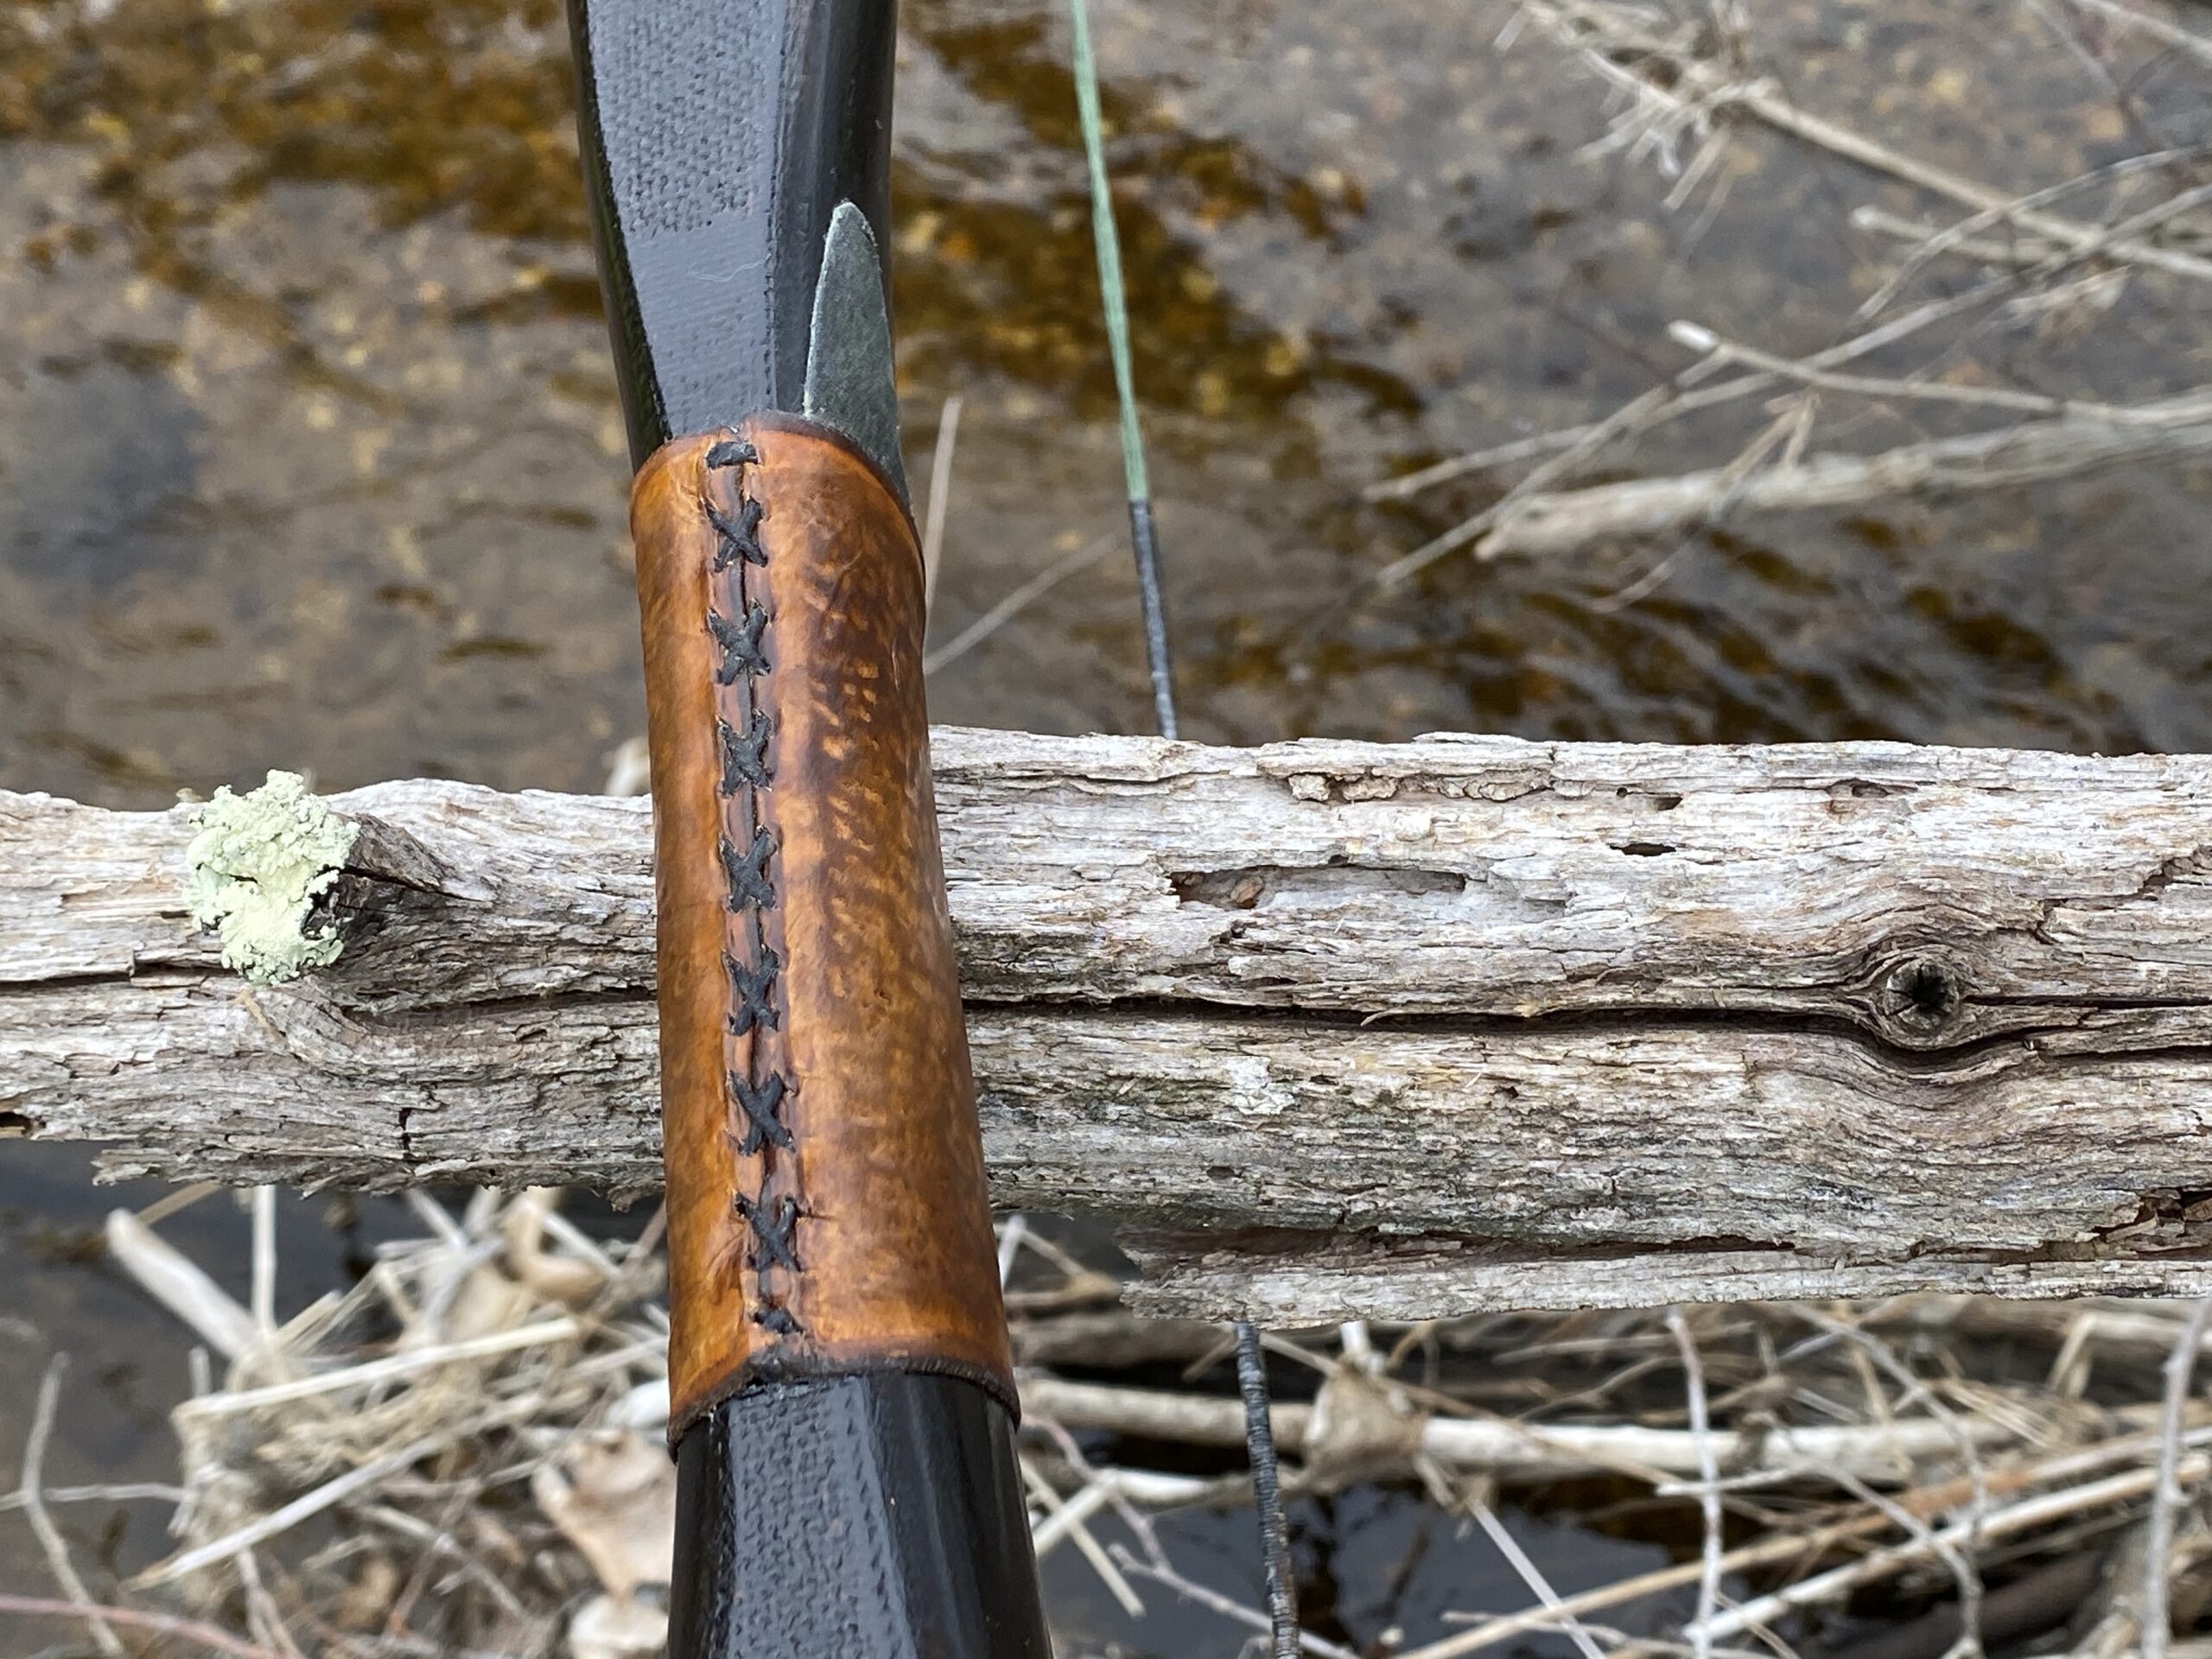
- Accents and Leatherwork
- Care and Maintenance
- Additional Resources
Music in this video comes from my talented cousin, the guitarist Marcos Topolanski Quintero. You can listen to the entire album Primero on Spotify, or download it on iTunes.
What you need
- Hardwood board ($10-15)
- Set of rasps and files ($25)
- Card scraper, knife, or homemade scraper ($0-10).
- Optional: hatchet, drawknife, chainsaw file, spokeshave.
- Workholding: vise or clamps (Optional but handy)
- Sandpaper. 220, 320 grit ($5)
- Choice of finish ($0-5) and optional stain
- String material. ($10) Bow string material such as B50, B55, Fast flight, etc are recommended. There are alternatives such as linen (look for bookbinding or shoemakers linen) non-stretch fishing line, and others. You can buy a string for a similar price to avoid the trouble, but you can make many strings if you buy a roll of material.
- Optional: serving jig and serving thread to increase string duration ($10.)
- If you have nothing else, paracord will shoot an arrow, just not as well as a proper string. It stretches too much, costing arrow speed and requiring constant adjustment, but it’s better than nothing.
- Handle, tip, and accent materials (Optional)
- Optional backing. Mostly for scratch protection. Tougher backings add a small amount of tension safety. Air is the best backing, since it’s the lightest. You don’t need a backing if you have a good board.
- Linen, denim, rawhide, or most any scrap cloth will make a decent backing.
- Avoid drywall tape, fiberglass cloth, duct tape, and dog chew rawhide. They can be made to work but are more problematic than effective.

Chapter 1: Wood Selection
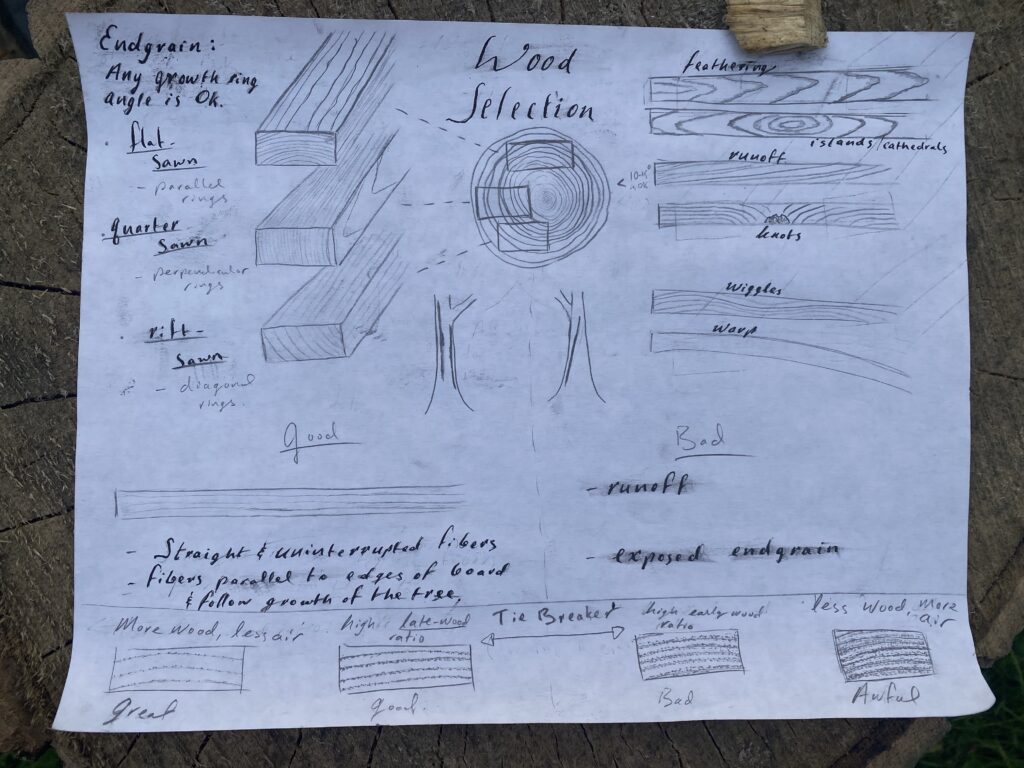
Board selection notes 
Maple, oak, hickory, and many other woods are suitable for this build 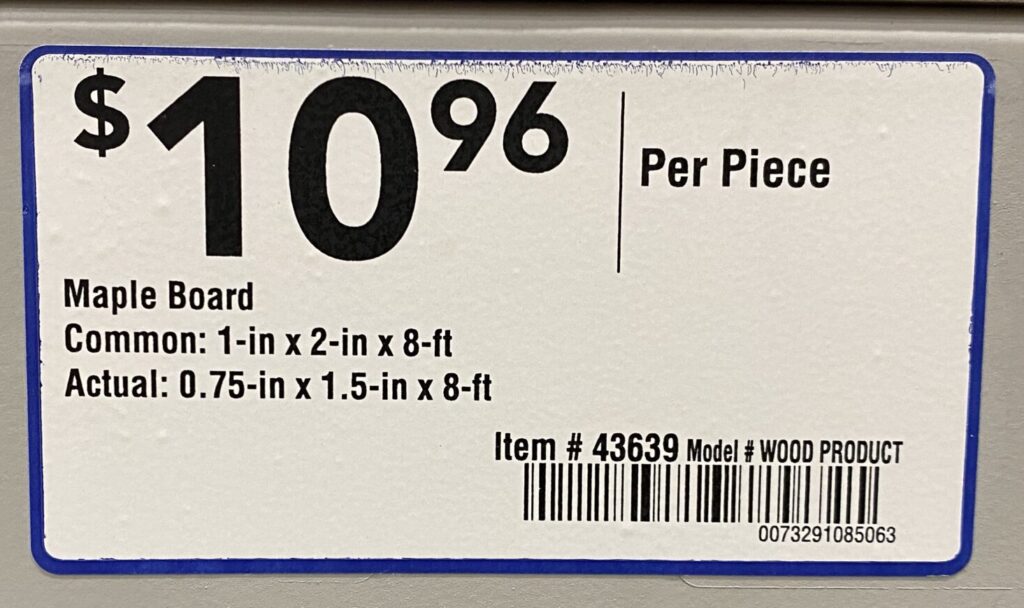
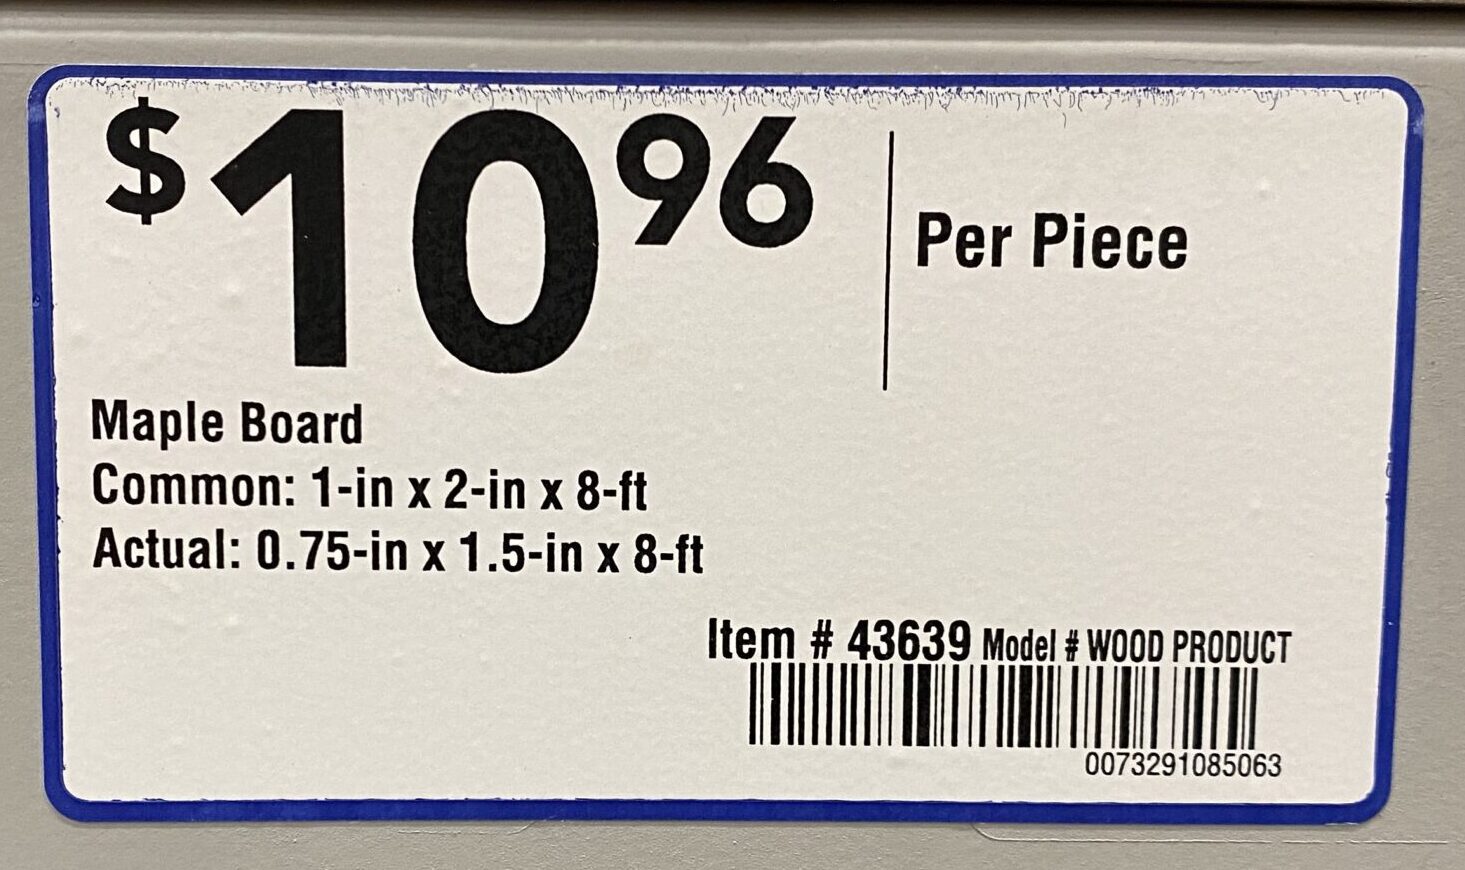
1×2 Maple Board, Price at Lowes 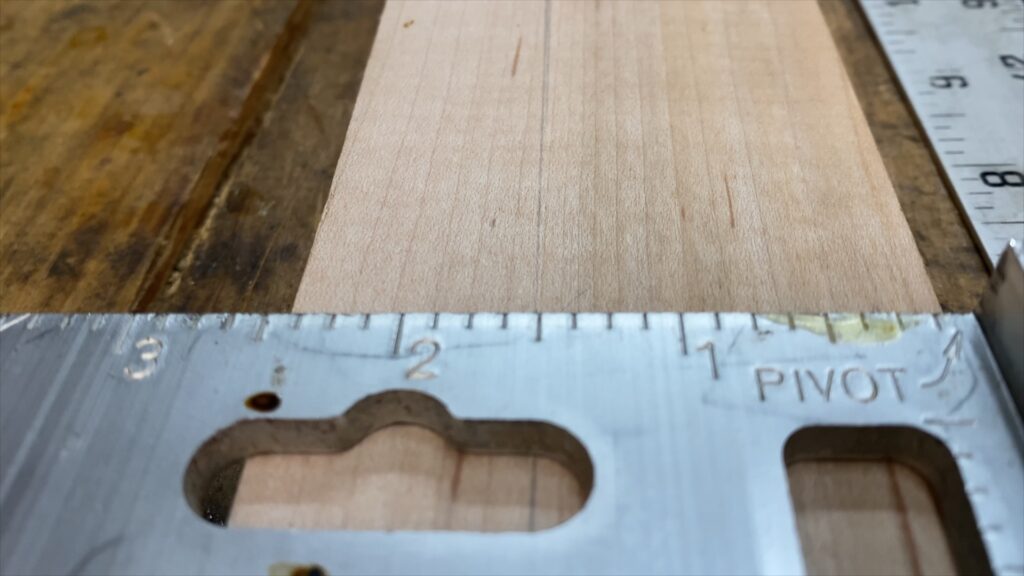
Use a 1×3 board for higher draw weights. A 1×2 should be enough for 40# or so 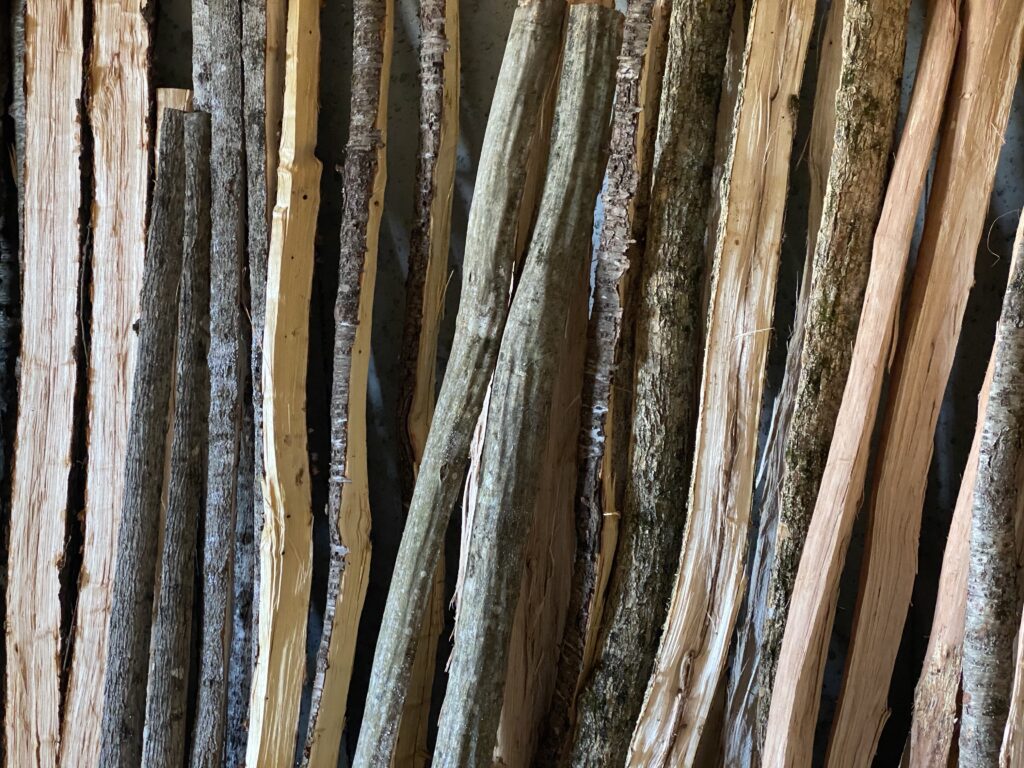
If you use a natural stave instead of a board, follow the fibers instead of cutting straight lines


I’m using sugar maple for this build (aka hard maple) but oak, hickory, ash, elm, and many other woods work just as well. Check out the Bow Wood Almanac (Coming Soon) for a list of reputable bow woods in your region.
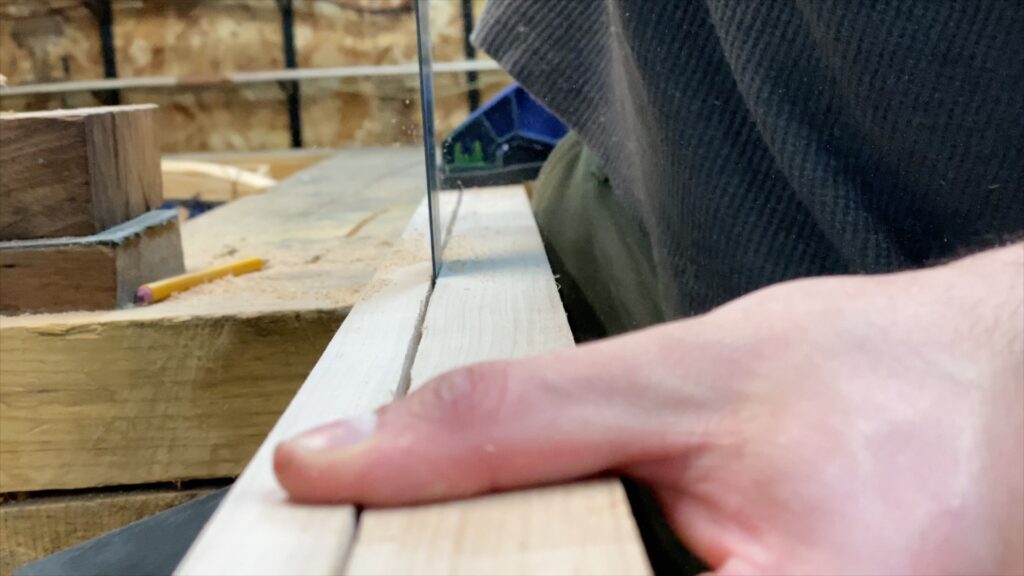
Seek out a board with straight fibers that go all the way through the board with minimal runoff to the sides. Most boards won’t make the cut, so expect to look through plenty. A 1×2 board 8 feet long works perfectly for this build, and happens to be a common size at Home Depot and Lowes.
The actual dimensions of a 1×2 are 1 1/2” by 3/4”. I used a total of 80” of 1×2, 72” for the bow and 8” for the handle riser. I didn’t find a good 1×2 so I got the nicest 1×3 I found and ripped down the sides.
Use a 1×3 if you’d like a draw weight much higher than 40 to 45 pounds. Just increase the width of the bow’s front profile in proportion to the increase in draw weight.
An ideal board has a clean strip of fibers all the way down the back. Keep an eye out for runoff, which is when the fibers run at an angle to the board. Avoid any signs that fibers have been cut prematurely, like feathering growth rings, island or cathedral patterns, and runoff. These can sometimes be ok on the belly or sides of the bow, but you don’t want them on the tension facing back. Also look out for standard defects like knots, wiggles and warp. Click on the Wood Selection diagram for examples.
The way the engrain looks isn’t as important as the faces of the board. You can use flatsawn or quartersawn lumber or anything in between. The growth ring angle pretty much doesn’t matter, unless you plan to chase a growth ring.
What really matters is the fibers: you want a board with straight and uninterrupted fibers all the way through its length. This is especially important for the back, which is under tension. You want the back of the bow to have a clean strip of fibers all the way through without any serious interruptions.
If you have to make a tie breaker between two boards then its worth looking at the endgrain. A good board will have a minimal amount of porous growth, resulting in more wood and less air. For the same reason, you should avoid low density woods like pine and poplar, unless you lower the draw weight or make your bow extra wide. These woods have less wood in the wood, so you need to compensate with a wider bow, or a lower less stressful draw weight.

Boards are just staves that have been mistreated. With good design, tiller, and wood selection, board bows are no worse than natural stave bows. You can roughly follow this buildalong with either, but natural staves will require some prep work such as removing the bark and inner bark. For the vast majority of species you can use the underbark surface of the tree for the back of the bow.
Mervyn Patterson
Hi, congratulations on your full tutorial.It was very well done,easy to follow and understand,one of if not the best tutorial I have seen.Thanks very much I as a amateur bowyer found it most informative but being English my experience is more toward the English Longbow or D section bow.I have had some success with Italian and Pacific Yew.After seeing this I will have a go at a flat bow.
Best wishes Mervyn Patterson UK.
dansantanabows
Thanks Mervyn. In the UK also keep an eye out for Ash, Elm, and Hazel. On facebook there’s a UK bowyer’s group you may want to check out. There’s probably someone close to you who can show you the ropes. There are also several UK bowyers on the other groups and r/bowyer. Good luck and enjoy the journey!
Duke
I am very new at this and can’t wait to start. thank you very much for these easy-to-follow instructions and video. As soon as I obtain the equipment and a good piece of wood I will try to follow your directions.
thanks again and be safe
dansantanabows
Glad to hear it Duke. Hope to see your bow on r/bowyer one day. Good luck and feel free to post as many tiller checks as you need
Gingdah
I enjoyed the detail that you have. This one of best Detail videos on making a bow I seem.
Tyson
Picked up a red maple board and a draw knife today, getting started this weekend. Can’t thank you enough!
dansantanabows
That’s awesome! With red maple I’d go for a slightly wider bow than I have, maybe 2” wide, or a slightly lower draw weight of 30 or 35 pounds. Next time if you can, try to get one of the maple species categorized as a ‘hard’ maple like sugar maple. Silver and red are a bit less dense, but don’t worry and it won’t stop you from making a bow. Just pay extra attention to the set and drop off the draw weight if you start seeing more than a couple inches.
Good luck and feel free to post as many tiller checks on r/bowyer as you need
Tyson
Thanks, Home Depot was my first stop for lumber, red maple was the best they had in hardwood planks at the moment, excluding mahogany. I did notice the porousness so went with the best most dense board I could find. I’ll post my progress!
Terry Bowmam
I am not able to get bow wood boards around here to sort thru.
I can get Black Walnut or Eastern Red Cedar bow making lumber, but requires a backing. I don’t want to waste my hickory backing yet, been a long time simce I made a wooden bow.
My question is, will that linen backing in your video be strong enough, with some reflex? Or maybe double it?
Thanls
dansantanabows
I’m not a big fan of doubling up on the backing because of the extra mess and glue line. Better to use a thicker backing from the start. I think with ERC lumber you’re probably going to need a hard backing unless you find a miraculously clean and straight board. With natural staves, if you’re able to chase or almost chase a ring then ERC can handle being unbacked, despite the popular advice. The problem is that the other popular advice for ERC is that it’s ok to violate the fibers on the back. This is only true to an extent and I wonder if this practice has much to do with juniper’s reputation for breaking in tension.
John Halverson
You would NOT be wasting your hickory backing on an Eastern red cedar board (so long as the board is fairly decent grained with few or no knots). In fact, Hickory backed eastern red cedar (often called HERC) is considered a superior combination for high speed, high efficiency bows.
dansantanabows
I will write more in the future as my formal ideas develop. My informal ideas are easily found on r/bowyer. Thanks for this backhanded compliment, I think.
Pat
I’m impressed, I must say. Seldom do I encounter a blog that’s equally educative and amusing, and let me tell you, you’ve hit the nail on the head.
The problem is something which too few people are speaking intelligently
about. I’m very happy I stumbled across this during my hunt for something concerning this.
Kevin
G’day Dan, fantastic tutorial. I have always wanted to make a bow and I would like to thank you for putting the time into your channel. I live downunder and I am trying to work out what local timber I can use. After watch this I think I will try to practice on a fine grained timber and will certainly look what is in town at the hardware as well. Thanks again. Cheers Kev
Rex
G’day Kevin, I’ve heard quite a few say Spotted Gum is a good option of you find a nice board. I couldn’t find any it the right size at my local timber supplier so I opted for a really straight bit of Jarrah as it’s properties looked similar to hard maple (density, elasticity and modulus or rupture), hopefully it will work. Some others have said iron bark could work for a bow, but that stuff is so hard it makes it difficult to shape.
Rex
G’day Kev
I’m keen to try this out as well. I’ve heard Spotted gum is a good option. I’m going to try it with some Jarrah. Ironbark might work but that stuff’s really hard, shaping it will probably be a pain and lots of tool sharpening.
Cheers,
Rex
Rex
G’day Kev
I’m keen to try this out as well. I’ve heard Spotted gum is a good option. I’m going to try it with some Jarrah. Ironbark might work but that stuff’s really hard, shaping it will probably be a pain and lots of tool sharpening.
Cheers,
Rex
Mickey O'Neill
Dan–My son and I have decided at the same time to get into traditional bow-making. We shot off and on for years, and really enjoy being out in the fresh air and sunshine losing arrows together!
We both truly appreciate your teaching style and the beauty of the videos you’ve made. Thanks for your generosity!
We both went to the store and got red oak boards for our first bows. That is some hard wood! It’s pretty slow going for the moment, but we’ll see how it goes as we progress.
We share the ultimate goal of crafting character bows out of wood we harvest for ourselves. We’re in Oklahoma, and tried over 20 years ago to make a bow from a piece of Osage Orange. Our attempt still hangs in my office! Hopefully, with your tutelage, we will produce something that shoots!
dansantanabows
Good luck Mickey! I heard from your son on reddit last week and am very glad to hear you’re taking on the project together. Let me know if you have any questions or trouble, and feel free to post as many tiller checks on reddit as you need. Go make a bow!
Ross H
Dan, I loved this tutorial. Extremely helpful, a friend of mine and bowyer, Correy Hawk pointed me to your video. I had a question regarding the scale of the bow.
If I wanted to follow your tutorial to make a kids bow (for a 3-5 year old) how does this scale down from the longer ones you make?
Thank you.
dansantanabows
Correy is an awesome bowyer and teacher. I would love to film one of his classes someday. To answer your question it depends a lot on the design. The absolute easiest way is to copy other kids bow’s dimensions that you see on other forums. Of course you can only copy the rough out dimensions since the true dimensions will be revealed by tillering. For a same length bow you can adjust the draw weight by scaling the width. And as a rough rule of thumb you can estimate the bow length by doubling draw length and adding on the length of your stiff handle, and adding a few extra inches per limb for stiff tips. This will give you plenty of margin for error. It’s possible to make a bow shorter but that will give you a nice safe length.