This is a companion article to my Youtube video of the same title. You can watch the video here

For higher quality PDFs of all the diagrams in the video, see the following downloadable file. I recommend keeping it open as you watch the video, especially for the last chapter covering the decision tree.
Today we’re exploring six ways to make the back of the bow, and clearing up all your questions about backings and chasing growth rings: why do it, how to do it, when you have to, and when you don’t.
Backings and ring chasing are some of the most fundamental topics in the art of bow making and yet they’re surrounded by mystery, confusion, and bad advice. Today’s goal is to put these doubts to rest with an abundance of examples. If you’re just here for ring chasing instructions, you’ll want to skip ahead to Chapter 2.
Before get into into the weeds we have to cover the alternative methods and take the question more broadly: how do you make the back of the bow safe under tension? The back of a bow can be under thousands of pounds of tension. So every bow must have an answer to this question or else end up in pieces.
Throughout human history we’ve solved the problem in a number of different ways. In each chapter I’ll cover one such approach to making a strong back, as well as modern and historical examples of each type. What unites all these methods is that they’re different ways of getting straight fibers all the way through the back, with as few interruptions as possible.
Why is that important? Well, wood is made of fibers that are relatively easy to separate, but very hard to tear. This is why it’s so easy to split a log lengthwise, while it’s much harder to cut through its width, even though the distance is smaller. This is why it’s so important to have your wood fibers span entirely across the back of the bow: that way they have to tear for the bow to break, rather than just separate.
If your bow has interruptions in the fibers across the back, we say it’s been ‘violated.’ As a result the fibers only have to separate and the bow is already on its way to failure. With a pristine, unviolated back, the fibers would have to tear first, and this takes much more force.
In other words, if the fibers in the back of your bow are violated, you’re not taking full advantage of the potential tension strength that your wood has to offer, and your bow will be much easier to break. We also say that a growth ring has been violated if its fibers have been cut through.
Let’s move on to Chapter 1: the Natural Back
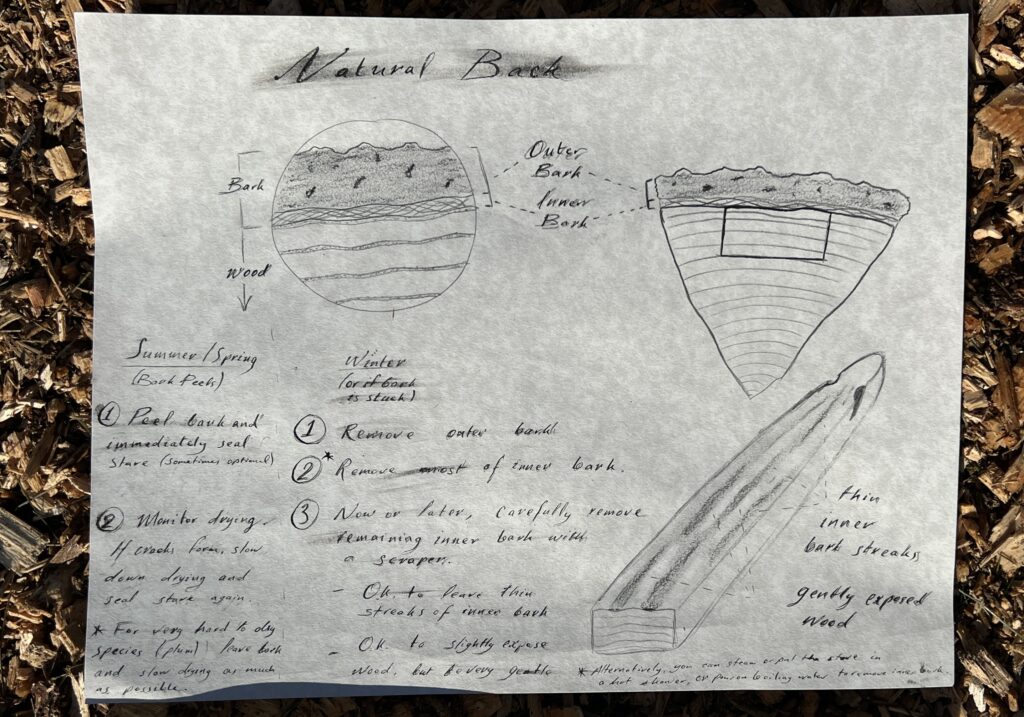
Chapter 1: the Natural Back
With most wood species, you don’t have to chase a growth ring since you can just use the underbark surface of the tree for the back of your bow. Nature’s basically already chased a growth ring for you.
If you use a whitewood and there isn’t any damage to the outside of the tree, then chasing a growth ring is a waste of time. Just take off the outer bark and the inner bark, and beneath that is the back of your bow. In the spring and summertime when the sap is running, you can peel the bark off all at once and you’ll get a pristine, unviolated back—no need to carefully shave off the bark.
Most species of bow wood fall into the bucket we call the whitewoods—as opposed to the heartwoods. The whitewoods tend to be mostly sapwood, perishable, fairly tension strong woods. Examples include ash, elm, hickory, hazel, hornbeam, etc.
The heartwoods on the other hand are either mostly heartwood, or have heartwood that is more prized as bow making material. Examples include osage, mulberry, locust, and laburnum. I’ll talk more about heartwoods in the chapter on chasing growth rings.
There are also many woods that fall in between the two categories. For example oak can be treated as either a whitewood or a heartwood. Yew and juniper on the other hand, while not hardwoods (they are conifers) can still be treated as either a whitewood or a heartwood, or even in between. We’ll talk more about this in the chapter on violated backs and English longbows.
Let’s quickly cover how to remove the bark with a drawknife, with a few examples. It helps to use the very end of your stave to get a bearing on all the different layers. Shave off the very end and sides until you expose the wood so that you can see how much bark you’ll have to take off (see video for details.)
For bow making purposes, there are only two layers of bark you need to worry about: the outer bark and the inner bark. Many bowyers call the inner bark the cambium, although technically the cambium is a specific, very thin layer within the bark. You can completely ignore it and only worry about the outer bark, the inner bark, and the wood.
Personally I’m allergic to the outer bark of most species, so I wear gloves and take steps to minimize contact. First scrape the crust off the outer bark, then take off all the outer bark. This should leave you with a thick, soft, and corky layer of inner bark. Thin it out a bit without nicking the wood: you need to be very careful not to damage the first layer of wood since it will make up the back of your bow.
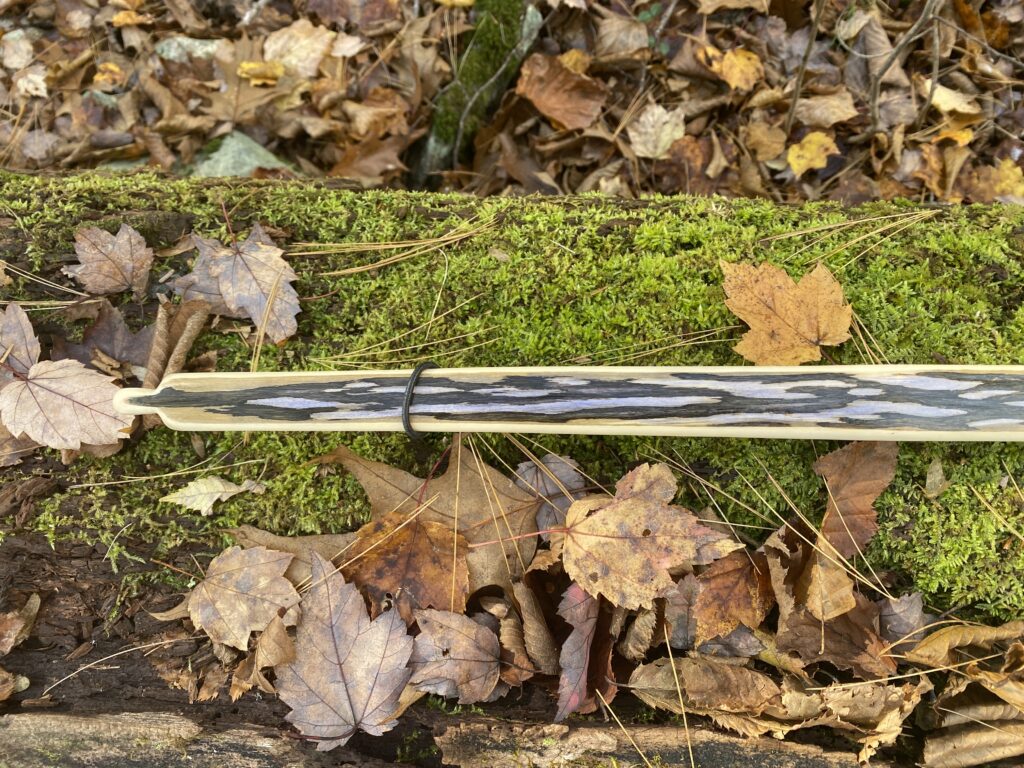
For now we’re done, but once the stave begins to emerge into a bow, I’ll gently remove the rest of the inner bark with a scraper. You can do this now if you’d like, but I prefer to keep the inner bark on the bow during the rough part of the construction because it protects the back from scratches and dings during the heavy work. You can either remove all the inner bark, or leave on thin bits of it for an attractive camouflage like pattern. That’s totally up to you, just don’t leave thick pieces of inner bark on the bow because they’re likely to crack and pop off later, which will ruin your finish.
If you’re worried about taking off the bark with a drawknife without damaging the wood, don’t worry and just cut the wood in the summer when the sap is flowing. The bark will peel right off. If you have winter cut wood, you can also steam the stave or throw it in a hot shower, and the bark should come off just like it’s summer.
For spring and summer cut wood, preparing the back is trivially easy: just peel off the bark and you’re all done. Now that we’ve covered the easy way let’s move on to Chapter 2: Chasing Growth Rings